| 1942 | 21 July | Japanese land at Buna-Gona-Sanananda beach-head area. |
| 23 July | Australians confront the Japanese for the first time at Awala. | |
| 28-29 July | First Battle of Kokoda. | |
| 8-10 Aug | Second Battle of Kokoda. | |
| 2-14 Aug | Battle of Deniki. | |
| 26-30 Aug | Battle of Isurava. | |
| 2 Sep | Australians withdraw to Eora Creek. | |
| 3 Sep | Australians withdraw to Templeton’s Crossing. | |
| 4 Sep | Australians withdraw to Myola. | |
| 7-8 Sep | Battle of Brigade Hill. | |
| 10 Sep | Australians withdraw to Nauro. | |
| 11-16 Sep | Battle of Ioribaiwa | |
| 17 Sep | Australians withdraw to Imita Ridge. |
| 1942 | 24 Sep | Japanese pull back from Ioribaiwa. |
| 12-16 Oct | Battle of Templeton’s Crossing. | |
| 22-19 Oct | Battle of Eora Creek. | |
| 3 Nov | Australians reoccupy Kokoda unopposed. | |
| 5-12 Nov | Battle of Oivi-Gorari. | |
| 15 Nov | Battle of The Sanananda Track commences. | |
| 9 Dec | Battle of Gona commences. |
| 1943 | 2 Jan | Battle of Buna commences. |
| 21 Jan | Major Japanese resistance at Buna and Sanananda ceases |
Japanese Advance/ Australian Withdrawal
21 July 1942, the first of 14,430 troops of the Japanese South Seas Detachment from Rabaul came ashore at Buna.
They planned to march across the Owen Stanley Range, across the Kokoda track. Once the invaders had secured Moresby, Australia would be at their mercy.
The 39th Australian Militia Battalion was rushed up that track from the Moresby end with orders to stop the invaders and to hold the only decent airstrip along the track, at the village of Kokoda, about halfway between Moresby and Buna.
The Kokoda Track, would be the scene for some of most ferocious hand-to-hand fighting of the Pacific War. The Diggers of Kokoda would write themselves into history by initially stalling and later defeating the Japanese march on Moresby, against all the odds.
< Previous
Next >
July & August, 1942
Late June 1942 General Blamey ordered the PNG commander, General Morris, to secure the Kokoda area.
General Morris created ‘Maroubra Force’ on 24 June comprising the 39th Battalion (less one company), a Papuan Infantry Battalion, and some supply and medical detachments.
21 July 1942, at the time of the Japanese landings on the north coast, the 39th Battalion was dispersed at several locations.
One company, commanded by Lieutenant ‘Judy’ Garland, was actually at Kokoda itself, defending the airstrip.
Two other platoons that had been in Kokoda, moved further north-east along the Track to Oivi, Awala and Gorari.
The young Diggers of the 39th were burdened with packs weighing almost 30 kilograms and wore desert khaki uniforms instead of jungle camouflage kit. Many were already malarial because their anti-malaria medicine had been administered too late.
The lead elements of the 39th met the Japanese just north of Kokoda – one company or about 120 Diggers faced the first wave of Japanese, about 1500 seasoned troops.
The weight of enemy numbers forced them to fall back to Kokoda where they regrouped.
The battalion’s Commander, Lt Colonel Owen, had 77 men left, most of whom had not slept for three nights. Nevertheless, Owen deployed his men around the Kokoda plateau and prepared to hold it against the invaders.
The young Diggers acquitted themselves well in the face of overwhelming numbers but, Colonel Owen was killed during the night of 29 July and the survivors were forced to withdraw from Kokoda and fall back down the Track.
The rest of the battalion joined them at a tiny village named Isurava and they decided to make a stand – about 500 Diggers against about 6000 Japanese.
Colonel Owen’s leadership and bravery was later recognized by the award of the American Distinguished Service Cross.
< Previous
Next >
August, 1942
14 August – D Company, 39th Battalion, set up an ambush position at the Wireless Station between Deniki and Isurava.
A section under the command of Corporal Jack Boland intercepted a Japanese patrol, near a huge, round boulder on the Track, and killed three enemy in the ambush.
24 August – one hour’s walk before Isurava, an Australian patrol (53rd Battalion) coming forward (north) from Isurava was ambushed. One Australia, the leading scout, Pte. MacGraw, and four Japanese were killed. The next day, another Australian patrol, coming across MacGraw’s body, tried to retrieve it, and was attacked and scattered by Japanese.
26 August – 40 minutes walk before Isurava, another 53rd Battalion patrol was attacked and a five hour battle ensued. The same day, 800 metres before Iusurava, contact was made with a Japanese patrol, eight of whom were killed.
On one occasion during this period Chaplin Earl of the 39th Battalion calmly walked forward along the track with a shovel over his shoulder to an Australian that had been shot dead at his listening post. This was well into no-man’s land where there were bound to be many Japanese watching. He dug a grave and reverently buried the dead soldier. Soon after he regained the Australian lines, the Japanese opened fire at a distance of 90 metres. This action was observed by over 50 witnesses.
< Previous
Next >
August, 1942
“Kingsbury rushed forward firing the Bren gun from his hip through terrific machine-gun fire and succeeded in clearing a path through the enemy for the platoon; a courageous action which made it possible for us to recapture the position. Continuing to sweep enemy positions with his fire and inflicting an extremely high number of casualties on them, Private Kingsbury was seen to fall to the ground, shot dead by a sniper hiding in the woods. Private Kingsbury displayed a complete disregard for his own safety. His initiative and superb courage made it possible for my platoon to retake the position, which undoubtedly saved Battalion Headquarters and at the same time inflicted heavy casualties on the enemy. His coolness, determination and devotion to duty in face of great odds was an inspiration to my men to which they could not but respond.”
“All that morning fierce fighting had been taking place and at midday a particularly heavy attack had been launched against the A Company positions. Corporal Bear, because of the death of his platoon commander and wounding of his platoon sergeant, assumed command of his platoon and continued to fire his light machine gun at point blank range inflicting at least 15 casualties and thus broke up the enemy attack. As soon as the enemy showed signs of withdrawing he volunteered to go out with a fighting patrol from another platoon to contact and destroy the enemy. In spite of being wounded in hand and leg in the fighting that morning he still continued on with the patrol until he was too weak to carry on and was then ordered back to the regimental aid post. It is considered that corporal Bear’s action in taking command of the remaining troops in his platoon, his denial of the area to the enemy and his own personal example of bravery and courage in manning his light machine-gun despite his wounds, was directly responsible for the company forward defence line being held and inspired the troops in the area to drive off the enemy attacks.”
(McAllester page 181)
< Previous
Next >
September, 1942
The pressure eased on the Australians late on 1 September and at dawn the next day the 2/16th Battalion began to withdraw through the 2/14th ambush positions. By 8a.m. they had set up new ambush positions just over half way towards Templeton’s Crossing to facilitate the withdrawal of the 2/14th. This type of leapfrogging was a common manoeuvre. Timing was critical. The leading men would wait until the Japanese were almost among them before opening fire. An entire Japanese patrol might be caught in their sights. As the remaining Japanese fell to ground, the leading Australians would break cover and run to the rear through their own men, and the process would begin again.
The 2/14th had welcome reinforcements on 2 September. Lieutenant Stan Bisset and 12 of his comrades who had been cut off at the Isurava Rest House area and forced into the bush, regained the Australian lines that day.
Templeton’s Crossing – This crossing of Eora Creek was named after Captain Sam Templeton who commanded the first company of the 39th Battalion that crossed the Owen Stanleys to meet the Japanese at Awala (north of Kokoda) at the very commencement of the campaign. Templeton did not actually fight at this spot, but because he had become something of a legendary figure amongst his men and because he was one of the first casualties of the campaign, Bert Kienzle named this crossing after him.
2 September: This was the position of an Australian food and ammunition dump.
For many it was the site of a forgotten luxury – a hot meal, prepared by the
company quartermasters. The standard fare was a stew made from bully beef,
biscuits and rice. Brigadier Potts paused here for a while to talk with some of his
men. He was heartened to see them ask for ammunition before queuing for their
meal.
Many of the troops thought that Templeton’s Crossing would be the site of the
next major stand by the Australians but Brigadier Potts, after a quick survey of
the area, decided against it.
The Japanese could easily bypass the site by taking an alternate route to Kagi,
so it was here that Potts made the decision to make a stand further south at
Brigade Hill. They pushed on to Myola from here.
On moving into the attack on the main Track the next morning, the Australians found the enemy had melted away from the far banks of the creek. However they soon found them, dug-in and waiting, some 500 metres further on. Attacks continued on the flanks with the 3rd Battalion on the right. On the morning of the 17th, their leading units came across Japanese machine-gun posts. Typical of the actions in which the Australians were engaged was one where a platoon commander, Lt. C.H. Richardson, was shot through the chest as he led his men forward. He fell backwards and then huddled behind a tree, breathing through the hole the bullet had made:
The Japanese counter attacked over the next two days and in various actions across a wide front, the 2/25th, 2/31st and 2/33rd Battalions lost 68 men killed and 134 wounded. 771 men were reported as suffering severe illness or disease.
< Previous
Next >
September, 1942
3 September: The Australians withdrew along this section of the Track on the morning of 3 September. They loathed most parts of the Track, but this section was regarded as ‘an abomination’. To quote the 2/14th battalion diary written by the Adjutant:
“The track was particularly muddy. On this occasion, in getting down some hillsides, I dislocated my shoulder twice within a few hours. Don Duffy (the Medical Officer) put it back, Roy Watson holding me while Don Duffy demonstrated his medical skill. Troops held onto each other in single file. Someone in front would have a torch, but the remainder stumbled, swore and scrambled on.”
The officers in General Headquarters in Australia naively gave this place the name of ‘The Gap’, thinking it was a narrow pass between un-scaleable cliffs, much like the Pass at Thermopylae in Ancient Greece, which had gained fame some 2,500 years previously. This was where 300 gallant Spartans had held off the entire Persian Army. In fact, the Kokoda ‘Gap’ is eleven kilometres wide, and although it falls away 2,000 metres on either side, it merely represents a depression along the summit ridge – a spot used by aircraft pilots to navigate over one of the highest crests on the range. None of the Allied general staff made it their business to get to know, with any intimacy, the terrain in which their men were fighting.
Hence the crazy order which came from McArthur’s abrasive chief of staff, Major-General Richard Sutherland (on the advice of the Chief Engineer, Major-General Hugh Casey) on 13 August 1942, to select points like The Gap, “so that the pass may be readily blocked by demolition with TNT”, to make it impassable to the Japanese. (The Diggers could also see one other slight problem with this plan – none of the Spartans had survived the battle of Thermopylae!).
< Previous
Next >
September, 1942
The 39th Battalion camped here on the night of 1 September, following their withdrawal that morning from Eora Creek.
The area became a major re-supply zone during the war. Due to the sodden
ground, planes could not land in the early stages of the campaign, but the C-47 biscuit bombers would line up over a target zone and, at an altitude of only 120
metres, a ‘bombardier’ would push supplies out the open cargo door. Unfortunately there was only about a fifty percent retrieval rate as supplies were often lost in the bush or damaged on landing. A landing strip was eventually built following the Australian advance and the first planes touched down on 28 October 1942.
The 2/14th, having withdrawn from Eora Creek, began to gather at Myola late on
the night of 3 September and the early morning hours of the 4th, and they
immediately collapsed into an exhausted sleep.
No fighting took place at Kagi. Because of the open nature of the terrain, it was a
dropping zone for supplies. Many of the troops camped here, notably the two leading companies of the 2/27th on the night of 4 September 1942, before they withdraw to Efogi.
< Previous
Next >
September, 1942
This was the site of one of the most horrific battles of the whole Kokoda Campaign. The village of Efogi is located in a valley and to its immediate south is Mission Ridge, quite obviously named after the derelict Seventh-Day Adventist Mission Hut that once stood there. The ridge’s peak, known as Brigade Hill, or more ominously, Butcher’s Hill, rises immediately beyond the initial ridge.
Brigade Hill
By the time the withdrawal reached Brigade Hill, the three AIF battalions were
able to fight together for the first time. The 2/14th, 2/16th and the 2/27th battalions took up defensive positions on the high ground at Brigade Hill and Mission Ridge. But the Japanese brought up even more troops and made a final concerted assault, aiming to wipe out the defenders with a knock-out blow.
In their first action against the Japanese, the newly-arrived 2/27th held the forward position with the other two units on ridges behind them. In a furious attack, the Japanese threw themselves at the Australians and drove a wedge between the two positions. Many who had survived the cauldron at Isurava, like Charlie McCallum, fell trying to hold Brigade Hill. Others, like Captains ‘Lefty’ Langridge and Claude Nye died in magnificent but futile attempts to break through to brigade headquarters against impossible odds.
Once again the Australian were forced to withdraw but, as always, they did so
denying their pursuers free access to the Track towards Port Moresby and taking a heavy toll as the Japanese progressed.
5 September: the 2/27th Battalion (Lt-Colonel G. Cooper), coming north to
reinforce its sister battalions (the 2/14th and 2/16th), dug in on the southern ridge overlooking Efogi village.
The same afternoon, the 2/14th and 2/16th, having withdrawn from Myola,
tramped wearily into Efogi. Sagging morale was lifted by the distribution of mail, the first they had received in five weeks. Some sat down and wrote their replies immediately. Envelopes had long since become pulp so the sticky paper from army biscuits was used to seal the letters.
Other men went straight down to the creek to cut away rotting socks from their pulpy feet and wash for the first time in many days. They settled into the village and slept as best they could, wrapped in their meagre groundsheets, through a night of soaking rain.
6 September: Next morning they began to fall back again, climbing up the ridge beyond the village where they greeted their mates from the 2/27th. They too had endured a miserable night, the rain having filled their hastily dug fox-holes. Filing through the 2/27th, the 2/14th and 2/16th took up positions at the rear, further up the ridge.
This then, was the first and only time Potts was to have his whole brigade together at one time and place. The fresh 2/27th numbered approximately 580 men. The 2/14th and 2/16th however, having been savaged by the fighting and the terrain, could muster a combined total of about 400, 25% of their original numbers. Not only that, but the brigade lacked its usual supporting units of artillery, heavy machine-guns and mortars. There were no engineers to assist with temporary fortifications, few medical staff, and dwindling reserves of food and ammunition.
By mid morning of the 7th, Japanese patrols began probing the Australian lines, and salvos from what was thought to be a long-range mortar or artillery piece heralded the commencement of battle. The gun fired again at 5p.m. killing two Australians and wounding five. Stan Bisset and the Intelligence section were in a forward observation position, personally counting over 1,500 enemy troops coming through Efogi village. These would constitute the main attacking force. Many more of the enemy were out of sight, following the standard Japanese outflanking movements. Many other Japanese would be coming up as reinforcements. They clearly outnumbered the 980 Australians dug-in on Brigade Hill by a ratio of six-to-one.
In the still hours before the dawn of 8 September, the Japanese began their long anticipated attacks. It is a day that will long be remembered as one of the most bitterly intense, costly, and at times utterly confusing actions ever fought by Australian troops. The four companies of 2/27th Battalion (totaling 580 men) were in the foremost positions and haddrawn themselves into a tight perimeter. ‘A’ Company, commanded by Captain A. Sims, at the front right, bore the brunt of the attacks. Rifle fire, grenades and automatic weapons beat the attackers back. The day’s fighting was so intense that by nightfall, six of Sims’ prized Bren guns had been knocked out. The company’s entire supply of 1,200
grenades, the battalion’s reserve supply of grenades, as well as 100 rounds of ammunition (per man) were exhausted!
Potts, with his 21st Brigade Headquarters Company, together with D company of the 2/27th Battalion (under Captain B.
Langridge), held the rear. Not only was Potts’ Headquarters Company critical to the co-ordination of the Brigade’s actions, it held all the battalion’s reserves of food and ammunition as well as the responsibility of guarding the main Track to the rear – the only speedy path of withdrawal. They were
generally referred to as the ‘old and bold’, being a motley collection of staff officers, signalers, clerks, cooks and runners; hardly cut in the dashing mould of the ‘rooters, tooters and shooters’ who held the front lines.
Headquarters was supposed to be furthest from the action. At first light on the 8th, Private Gill of the Guard Platoon and Brigadier Potts had made their way to the latrines on the side of the ridge, anticipating a quiet moment to themselves. It was not to be. A single shot rang out. It was a Japanese sniper.
The bullet hit and killed Private Gill and sent Potts scurrying for cover. It is fair to say it caused panic among the whole Headquarters Company, whose members immediately found themselves heavily engaged by the Japanese with rifle fire and grenades, which soon gave way to vicious hand-to-hand fighting.
So serious was the situation that shortly before his wireless failed at 10a.m., Potts made contact with Lt-Colonel A. Caro, commander of the 2/16th Battalion, with instructions that he was to take command of the brigade if headquarters was wiped out. Caro and his battalion were situated about 400 or 500 metres further forward, and Potts desperately called onhim to attack back along the Track towards headquarters and, if necessary, call on the 2/14th to fall back at the same time.
Caro himself, however, was fully occupied. Like headquarters, he had found his perimeter almost surrounded and had been totally engaged since 6a.m. The first attempt to move back was immediately thwarted, so Caro radioed ahead to both the 2/14th and 2/27th Battalions with urgent requests that they, too, were to fall back, link up with the 2/16th, and together, attempt to push through to headquarters.
Thus began a series of company-by-company, platoon-by- platoon attacks, all with the aim of falling back along the Track. Some met with limited success, breaking into small groups and storming through to the headquarters perimeter under a withering hail of fire. Others, like Captain Claude Nye of B Company, 2/14th Battalion, were overwhelmed, and Nye and sixteen of his men lay slain beside the Track.
“Captain Nye was idolised by B Company who could scarcely believe that this lively spirit, to whom they had looked for guidance and leadership, had been killed. As platoon commander, as staff officer and as company commander, he had shown himself a most resourceful, reliable and courageous officer.” (Russell p 164)
One of those slain with Nye was the gallant Charlie McCallum, winner of the Distinguished Conduct Medal at Isurava.
Frantic radio signals flooded the headquarters’ wireless, most relaying the relative hopelessness of the various company positions. Potts then called for a near suicide mission – if his three battalions couldn’t reach him, he would attempt to reach them. He called for some of his men to attack up the track from the headquarters’ position. Captain B. Langridge of D Company, 2/16th Battalion, together with Lieutenants W. Grayden and H. ‘Bluey’ Lambert, being the furthest forward, were asked to lead the charge. Unquestioningly and calmly, Langridge pulled his identity discs from round his neck and retrieved his paybook from his haversack, and wordlessly handed them to one of his mates. He then stood, turned and moved forward, beckoning his two platoons to follow. Within minutes, Langridge, Lambert and twenty of their men were killed. The remainder were forced to ground by intense fire.
To quote Peter Brune (p.160): “That horrendous Brigade Hill action typified the spirit of Maroubra Force – not just blindly reckless but calmly brave, and faithfully accepting the duty that often meant death.”
As darkness fell, largely due to Langridge’s action, Japanese pressure eased just sufficiently enough to enable Potts and his company to disengage and fall back along the main Track to Menari. In order, the 2/16th, 2/14th, and 2/27th were able to move from their positions higher on the ridge, under cover of darkness, to a very narrow, steep and closed-in track in an attempt to reach Menari by a circuitous route, well to the east. The 2/27th fought a rear- guard action, on occasion rushing back in short, sharp attacks on the Japanese, to confuse them and slow their advance. Progress by the main body of the Australians was painfully slow as the men slashed at the bush and the undergrowth barring their way. Some men pushed on as quickly as they could in order that they might reach and hold Menari, always fearing encirclement. Meanwhile, other groups were left to carry the wounded, hoisting, lowering, pushing and pulling the stretchers through the dense bush.
The Battle of Brigade Hill exposed the full gamut of the mens’ emotions. Major H. Stewart, a Regimental Medical Officer (RMO) recalls a moment of true pathos:
Despite the enormous loss of life, the trauma of battle, the horrendous suffering of the wounded and the physical and mental exhaustion, morale remained high. Wisecracks flowed freely, except when absolute silence was necessary. The weakest jokes never failed to raise a smile from hollow, stubbly cheeks. Lance Corporal Watson, for example, for his deeds in reconnoitring the alternate route to Menari, was dubbed ‘The Boy Wonder’. The irrepressible Lieutenants McGavin and Clements, during a particularly serious moment of the Battle, were heard rendering harmonised excerpts from the ‘Song of India”! (McAllester p 165)
< Previous
Next >
September, 1942
9 September 1942: Potts was in Menari by early morning having broken with the Japanese at dusk the previous evening. By 11.30a.m. some of the 2/14th and 2/16th were arriving, already under heavy attack from the Japanese. Some men were held in position in front of the village near the creek, others in the village itself, and others at the rear creek. The Japanese were able to concentrate fire on the village from the high ground, and so at 2.30 p.m. Potts ordered the retreat to Nauro. Lieutenant Lex Tillyman and others made repeated forays into the bullet-swept village to salvage stores, primarily tins of salmon, bully beef and cheese, enabling men of the 2/14th and 2/16th to get some food into their empty stomachs before tackling the steep track out of Menari.
Meanwhile, the stretcher parties from all three battalions were making slow progress down the alternate (eastern) route into Menari. By mid afternoon, the Japanese had occupied much of the front creek, and so the stretcher parties had to detour even further to the east to avoid them. So too did those of the 2/27th who had fought the rearguard action.
The Story of The 2/27th withdrawal
The dramatic story of withdrawal of the 2/27th Battalion, their inability to regain their brigade’s lines, and their three week ordeal in regaining the base area is worth relating.
In the two days of fighting at the Efogi position, the 2/27th lost 39 killed, two missing presumed killed, and 46 wounded. The enemy dead (counted later by the advancing 25th Brigade the following month) numbered in excess of 200, testimony to the intensity of the action.
As the battalion began its withdrawal on the morning of 9 September, one company and two platoons (totaling 75 men) under Captain C.A. Sims, pushed ahead to Menari unencumbered with wounded, with the aim of ascertaining if it was still in Australian hands and, if it was, to assist in its defence until the remainder of the brigade could regain this line. Meanwhile Lt.-Colonel Geoff Cooper remained with the main body of his men. Enough troops had to be held back to form an effective rearguard as well as to assist with the wounded. (Up to eight men, rotating, were required per stretcher.)
< Previous
Next >
September, 1942
In the area where we camp, the famous Australian war correspondents and photographers, Damien Parer and George Silk, both of the Department of Information, set up their own camp in September 1942. They took many movie and still pictures here and filed many of their press releases from this spot. They had been right up to the front line at Eora Creek.
9 September 1942: The 2/14th reached Nauro about 5p.m. It had rained all afternoon and the flat section of the Track beside the river was a quagmire. Most men jumped into the river fully clothed to wash off the mud. Major Phil Rhoden, Acting Commander of the 2/14th handed over control to a new commander, Major H.B. Challen. For his sterling services at the most taxing time in the battalion’s history, Major Rhoden was mentioned in dispatches. He was later awarded the Order of the British Empire.
10 September 1942: The 2/14th and 2/16th, because of their reduced numbers, were combined into one composite unit.
Early in the morning of the 10th they began the climb up the range from Nauro and, on finding a good defensive locality, set up defensive positions and camped for the night.
11 September: At about 7a.m. in the morning Private Jack Shimmin was occupying a forward weapons pit when a Japanese soldier came strolling along the Track with his rifle slung over his shoulder. Shimmin had no option but to shoot to kill. The action was extraordinary, and the Australians could only conclude it was a suicidal action aimed at drawing fire so as to determine their positions. At 8a.m. the enemy attacked in force from all sides. Three Australians were killed and many more wounded.
< Previous
Next >
On 23 January 1942, 20,000 troops from the Japanese South Seas Detachment (the Nankai Shitai) overwhelmed the 1400- strong Australian garrison at Rabaul, an Australian Protectorate.
For the first time in our history, Australian territory had been invaded.
This shock was compounded when the supposedly pregnable fortress of Singapore fell on 15 February 1942. Some 30,000 British and Allied troops were trapped there, including virtually the entire Australian 8th Division – about 15,000 Diggers. They began the tortuous road which would see them decimated in Changi and on the Burma-Thailand Railway.
The government rushed back our most experienced troops from the Middle East.
Government sent a handful of untried militia battalions to Port Moresby to try to hold on until the AIF troops could return.
Young militia soldiers had volunteered just months earlier and had received minimal.
They were under-trained, under-equipped and vastly outnumbered. Their average age was eighteen and a half.
Yet it would be these young Diggers who would shatter the myth of invincibility surrounding the Japanese invaders – hardened veterans who had been undefeated in almost constant combat since they invaded Manchuria in 1937.
| 1939 | September | World War breaks out in Europe. Second AIF formed. |
| 1940 | January | Australian troops sail for the Middle East. |
| May | Winston Churchill becomes PM of Britain. | |
| June | Dunkirk evacuated. France falls. Italy joins war on Germany’s side. | |
| September | Italian troops advance towards Egypt from their bases in Libya | |
| December | Australian troops see action in North Africa. | |
| 1941 | January | Tobruk is occupied by British and Australian troops. |
| February | Rommel appointed German commander in North Africa. Australian 8th Division arrives in Singapore. | |
| April | German offensive begins in North Africa. Siege of Tobruk begins. | |
| May | Australian and British troops fight ill-fated campaign in Greece and Crete. | |
| June | ‘Operation Barbarossa’, Germany’s attack on Russia, begins. | |
| August | Robert Menzies resigns as Australian PM. Arthur Fadden new PM. | |
| September | Australian troops withdrawn from Tobruk. | |
| October | John Curtin becomes Australian PM. | |
| November | HMAS ‘Sydney’ sinks in Indian Ocean with all hands lost. | |
| December | Japan attacks US Pearl Harbor fleet. Germany declares war on US | |
| 1942 | February | Singapore falls to the Japanese. Darwin is bombed. |
| March | The Dutch East Indies (the western half of New Guinea) falls to the Japanese. Japanese troops land in (the Australian Territory of) New Guinea. MacArthur arrives in Australia. | |
| May | The Battle of the Coral Sea takes place. Japanese midget submarines enter Sydney Harbour. | |
| June | The Battle of Midway takes place. Japanese naval power is checked with the loss of four aircraft carriers. | |
| July | Australian troops begin operations along the Kokoda Track. | |
| August | US troops land at Guadalcanal in the Solomons. Australian troops engage the Japanese at Milne Bay. The Battle of Stalingrad begins. Battle of Isurava on the Kokoda Track takes place. | |
| September | Battle of Brigade Hill on the Kokoda Track takes place. The Japanese advance on Port Moresby is halted at Ioribaiwa Ridge. | |
| October | The Australians begin to push the Japanese back along the Kokoda Track. The Battle of El Alamein in North Africa begins. | |
| November | The Battles at Gona, Buna and Sanananda, at the north end of the Track, begin. | |
| December | Gona falls to the Australians | |
| 1943 | January | Sananada and Buna fall to the Australians and Americans. |
| February | The German Sixth Army surrenders at Stalingrad. | |
| July | Mussolini is overthrown in Italy | |
| September | Curtin’s Labor Government is returned in a national election. | |
| 1944 | April | Australian troops occupy Madang, New Guinea. |
| June | Allied troops enter Rome. D-Day landings in France. | |
| July | US troops land in Guam. | |
| August | Paris liberated. | |
| October | Japanese kamikaze attacks begin. | |
| 1945 | April | Hitler commits suicide in Berlin. |
| May | VE Day (Victory in Europe). | |
| July | Australian PM John Curtin dies. | |
| August | Two atomic bombs dropped on Japan. | |
| 15 August | VJ Day (Victory against Japan). End of WWII. |
Before returning to the town, one must turn right off the main road, down ‘Pilgrim’s Way’, and spend some time at the Commonwealth War Grave Commission cemetery. Simple wrought-iron gates open onto a grass forecourt enclosed by a bank of colourful tropical shrubs and trees.
This cemetery was commenced in1942 by the Australian Army. At the end of the war, all Australians whose remains could be located were taken from their temporary resting places on the Papuan and Bougainville battlefields and re-interred here at Bomana. The cemetery contains 3,779 burials and is the largest in the Pacific area. The nationalities are:
In the Owen Stanley sector of the campaign from 22 July 1942 to 16 November 1943, the Australians lost 625 soldiers killed and a further 952 seriously wounded. A further 4,000 men were hospitalized due to illness and disease. A similar number of Australians were killed and wounded in the battles for the Gona-Sanananda-Buna beach-head area between November 1942 and January 1943.
“It is a pity Australia lacks the historians and poets of ancient Greece. The legend of the 300 Spartans who held the pass at Thermopylae against thousands of Persians has lived on for nearly 2,500 years. We had our Thermopylae, in which several thousand young men, their average age – 21 years – fought some 10,000 Japanese for seven weeks in July and August, 1942, and saved their country from enemy occupation. But they are almost entirely unremembered and unhonoured.
When their part in the battle of the Kokoda Track, in New Guinea, was over, our Spartans had lost 350 men killed in action (the whole campaign cost 1,300 Australian lives). Hundreds more were seriously wounded, missing in action, or racked with disease or illness. Our Spartans entered their great confrontation with the Japanese at Isurava, on 26 August 1942. The Anzac legend, forged in the cauldron of Gallipoli, is enshrined in Australia’s history. The courage, endurance and mateship shown by the Diggers, sixty years ago now, forms part of our national spirit.
Similarly, the Diggers of the Second World War left their indelible legacies of selfless sacrifice. If Gallipoli symbolises the ANZAC spirit in the First World War, then the Kokoda Track is its equivalent in the Second World War.
Over sixty years ago, a handful of young Australian Diggers clambered along the treacherous Kokoda Track and stemmed the seemingly invincible onslaught of Japan’s Imperial Army.
The Diggers of the Kokoda Track formed Australia’s ragged last line of defence against a Japanese war machine which had swept unchecked through Asia and the Pacific. Some were young militiamen, hastily trained and untried in combat. They were joined by the young Diggers returning from the Middle East. Together, they were outnumbered and outgunned by their battle-hardened opponents.
Nevertheless, the Diggers overcame the terrain, their lack of support and initial setbacks to rally and to inflict the first defeat suffered by the Japanese in the Second World War.
The ANZAC spirit was rekindled. If Gallipoli was Australia’s baptism as a nation then Kokoda was her confirmation.
Sir William Slim of Burma wrote: ‘Some of us may forget that of all the Allies, it was the Australians who first broke the spell of invincibility of the Japanese.’
So why aren’t our Diggers of Kokoda a national legend? If 15,000 people can gather at Gallipoli every Anzac Day, why are the locations where these young men gave their lives in the defence of their country so over-looked? Why are there no memorials on these hallowed grounds?
Unfortunately, Australia had surrendered her sovereignty during this period (of the war) to General Douglas MacArthur, a notorious self-publicist, who totally controlled war news disseminated from and within Australia.
MacArthur was lobbying Washington for American reinforcements and it suited his purpose to denigrate the fighting ability of the Australians. His chief of staff, Major- General Richard Sutherland, described Australian soldiers as ‘undisciplined, untrained, and useless.’
Frank Devine refutes this by referring to an interview he had with Lieutenant-General Tsutomu Yoshihara, chief of staff of Japan’s South Seas army, who said of our Spartans: ‘In the Kokoda battle their qualities of adaptability and individual initiative enabled them to show tremendous ability as fighting men in the jungle. They were superb.’
Unfortunately, Australia is yet to honour the legend of Kokoda. Our politicians make the appropriate speeches on the appropriate occasions but their words seem a little hollow when judged against the actions taken to preserve and perpetuate the spirit of Kokoda.
The Track itself is a neglected shrine. Aircraft, weapons and munitions lay rusting in the jungle. Weapon pits, in which our Diggers fought for their very lives, lay unmarked. The location of Deniki and Isurava have been lost. The location of the Brigade Hill Battle is uncertain. The legendary “fuzzy-wuzzy angels” are yet to be officially recognised for their sacrifices.
The Australian population is largely ignorant of the details of the significance of the Kokoda campaign.
Compare this national neglect with the American approach to a battle of similar significance in 1836 – the Battle for the Alamo. The odds against the Australians were greater at Isurava than they were against the Americans at the Alamo yet virtually nobody has heard of the village of Isurava! The Americans created legends out of their heroes of the Alamo – Davy Crockett, Daniel Boone, Jim Bowie and Colonel Travis. We are yet to hear of our heroes at Isurava and Brigade Hill: Bruce Kingsbury VC, Charlie McCallum DCM, Claude Nye, “Lefty” Langridge and Colonel Honner!
Our lack of commitment to the legend was recently demonstrated by the refusal of the Sydney Olympic Games Organising Committee (SOCOG) to accept a proposal to carry the Olympic Torch across the Kokoda Track en route to the 2000 Sydney Olympic Games. They took it to American Samoa, but not across the Track. The ghost of General MacArthur still hovers in the corridors of Canberra, and the subservience of our politicians has not changed.
We have spoken of the deeds of our Diggers enough over the past sixty years. Now it’s time to take action to ensure the legend is enshrined in our historical teachings and in our psyche. …………….You can now do this!!
A 17 year old veteran of the Kokoda campaign, Private Burton, wrote: ‘Now on Kokoda Day when the names are read out of those killed in action, I know them all and still see them as they were. They will never become old or embittered. Just laughing kids forever.’
The commander of the young militiamen of the 39th Battalion, Colonel Ralph Honner DSO MC, paid the following tribute: ‘They have joined the immortals; and of their immortality this searching and revealing history is both faithful testimony and enlightening testament. Time may dull even the untarnished gold of their emblazoned battle honours; but the loom of ages cannot blur the pure oblation of their lives.
Many a mother in Australia, When a busy day is done, Sends a prayer to the Almighty For the keeping of her son, Asking that an Angel guide him And bring him safely back
Now we see those prayers are answered On the Owen Stanley track.
For they haven’t any halos, Only holes slashed in the ears,
And with faced worked by tattoos, With scratch pines in their hair, Bringing back the wounded,
Just as steady as a hearse, Using leaves to keep the rain off And as gentle as a nurse.
Slow and careful in bad places, On the awful mountain track, And the look upon their faces,
Makes us think that Christ was black. Not a move to hurt the carried,
As they treat him like a Saint, It’s a picture worth recording, That an Artist’s yet to paint.
Many a lad will see his Mother,
And the Husbands, hug their Wives, Just because the Fuzzy Wuzzy Carried them to save their lives.
From mortar or machine gun fire, Or a chance surprise attack,
To safety and the care of Doctors, At the bottom of the track
May the Mothers in Australia, When they offer up a prayer, Mention those impromptu Angels, With the Fuzzy Wuzzy hair.
Sapper H “Bert” Beros NX6925, 7th Div., RA
I was born on the 9th of July 1900, and the Constitution of the Commonwealth of Australia is my birth certificate. The bloodlines of the world run in my veins, because I offered Freedom to the oppressed. I am many things and many people. I am Australia
I am millions of living souls, and the ghost of millions who have lived and died for me. I am Edward Hargraves, and Charles Cowper. I stood at the Eureka Stockade and fired the first shot which was heard around the world I am John King, Burke and Wills. I am Dennison Miller, Breaker Morant, Private John Simpson, Lance-Corporal Albert Jacka and the ANZAC boys. I am John Flynn, Charles Kingsford-Smith, Harold Lasseter, King O’Malley and Jack Lang.
I remember the Burma railroad, the Kokoda track and Tobruk. When Freedom called, I answered and stayed until it was over, over there. I left my heroic dead at Flanders field, on the rocks of Gallipoli, the desert of Palestine, the beach’s of World War Two, on the slopes of Korea and in the jungles of Vietnam.
I am the Sydney Harbour Bridge, the wheat fields of the west, and the Snowy Mountains of the south. I am the coalfields of Queensland, and the timber in Tasmania, the Overland railway, Ayres Rock, and the Barrier Reef. I am the dog that sat on the tucker box, and the black stump.
I sprawl from the Indian Ocean to the Pacific, three million square miles, In past years I throbbed with industry, and had two million farms.
I am forest, field, mountain and desert. I am quiet towns and cities that never sleep.
Yes, I am the nation, and these are the things that I am. I was conceived In Freedom and, God willing, in freedom I will spend the rest of my days. May I posses always the integrity, the courage and the strength to keep myself unshackled, to remain a citadel of freedom and a beacon of hope to the world.
I am Australia.
They went with songs to battle They were young,
Straight of limb, true of eye Steady and aglow,
They were staunch to the end Against odds uncounted,
They fell with their faces to the foe.
They shall not grow old
As we that are left grow old; Age shall not weary them Nor the years condemn.
At the going down of the sun And in the morning
We will remember them We will
remember them Lest We Forget
Lest we forget
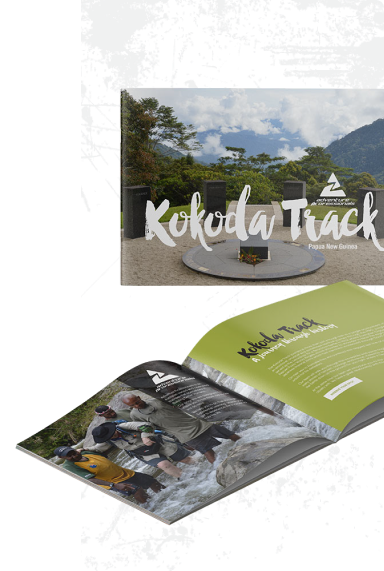
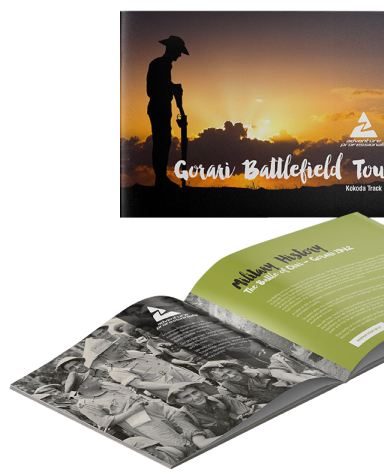
Register your interest to receive our electronic brochure so we can fill you in on the exciting details of this adventure.
Register your interest to receive our electronic brochure so we can fill you in on the exciting details of this adventure.

Register your interest to receive our electronic brochure so we can fill you in on the exciting details of this adventure.
Register your interest to receive our electronic brochure so we can fill you in on the exciting details of this adventure.
Register your interest to receive our electronic brochure so we can fill you in on the exciting details of this adventure.
Register your interest to receive our electronic brochure so we can fill you in on the exciting details of this adventure.

Register your interest to receive our electronic brochure so we can fill you in on the exciting details of this adventure.

Register your interest to receive our electronic brochure so we can fill you in on the exciting details of this adventure.